“This post contains affiliate links. As an Amazon Associate, I earn from qualifying purchases”
Raising chicken chicks can be a fun and rewarding experience. Whether you’re aiming to have a flock of egg-laying hens or just enjoy the charm of these little birds, there are some key things to keep in mind. From creating a cozy brooder to ensuring they stay healthy, this guide will help you learn how to raise chicken chicks successfully. Here are some essential tips to get you started!
Key Takeaways
- Set up a warm and safe brooder for your chicks to thrive.
- Choose the right starter feed to meet their nutritional needs.
- Keep everything clean to prevent sickness among your chicks.
- Monitor their health and behavior daily to catch any issues early.
- Introduce chicks to their new home gently and create a secure environment.
Creating A Comfortable Brooder Environment
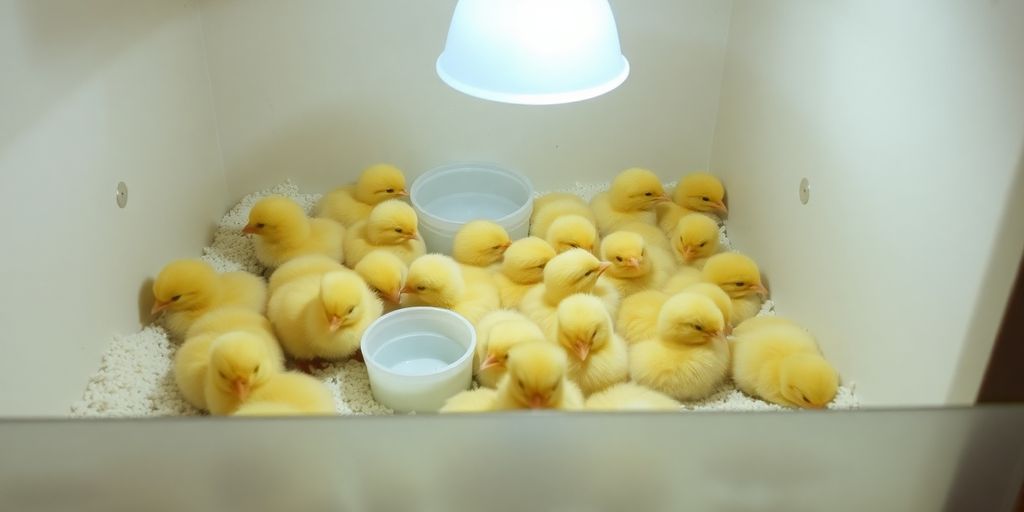
Getting your chicks off to a good start means setting up the right brooder. It’s more than just a box; it’s their safe haven for the first few weeks. Think of it as their nursery, where they need to feel secure, warm, and have easy access to food and water. A well-prepared brooder sets the stage for healthy, happy chickens.
Choosing The Right Brooder Size
Space matters, even for tiny chicks. Overcrowding can lead to stress, disease, and even pecking. Start with at least 0.5 square feet per chick. As they grow, you’ll need to increase this to avoid problems. A good rule of thumb is to observe their behavior. If they seem cramped or are constantly bumping into each other, it’s time for a bigger brooder. You can use anything from a large cardboard box to a plastic tub, or even a sectioned-off area in your garage. Just make sure it’s secure and easy to clean.
Maintaining Proper Temperature
Temperature is critical, especially in the first few weeks. Chicks can’t regulate their own body temperature, so they rely on you to provide the right amount of heat. The ideal temperature for the first week is around 90-95°F (32-35°C). You can use a heat lamp or a brooder plate to achieve this. Lower the temperature by about 5 degrees each week until they’re fully feathered or the ambient temperature is around 70°F (21°C). A thermometer placed at chick level is a must. Watch your chicks’ behavior too; if they’re huddled together, they’re too cold; if they’re spread out and panting, they’re too hot.
Providing Adequate Bedding
Bedding isn’t just for comfort; it’s also about hygiene. It absorbs moisture and helps keep the brooder clean. Pine shavings are a popular choice because they’re absorbent and relatively inexpensive. Avoid cedar shavings, as they can be harmful to chicks. Other options include chopped straw or paper-based bedding. Make sure the bedding is at least 2-3 inches deep to provide good insulation and absorption. Change the bedding regularly, at least every other day, to prevent the buildup of ammonia and bacteria. Clean feed and water are also important.
A clean, dry brooder is essential for chick health. Damp bedding can lead to coccidiosis and other diseases. Regular cleaning and fresh bedding are key to preventing these problems.
Feeding Your Chicks Properly
Alright, so you’ve got your chicks, and they’re all settled in. Now comes the really important part: making sure they get the right food. It’s not just about tossing some feed their way; it’s about understanding what they need to grow up healthy and strong. Think of it like this: you wouldn’t feed a baby steak, right? Same idea here. Let’s get into the specifics.
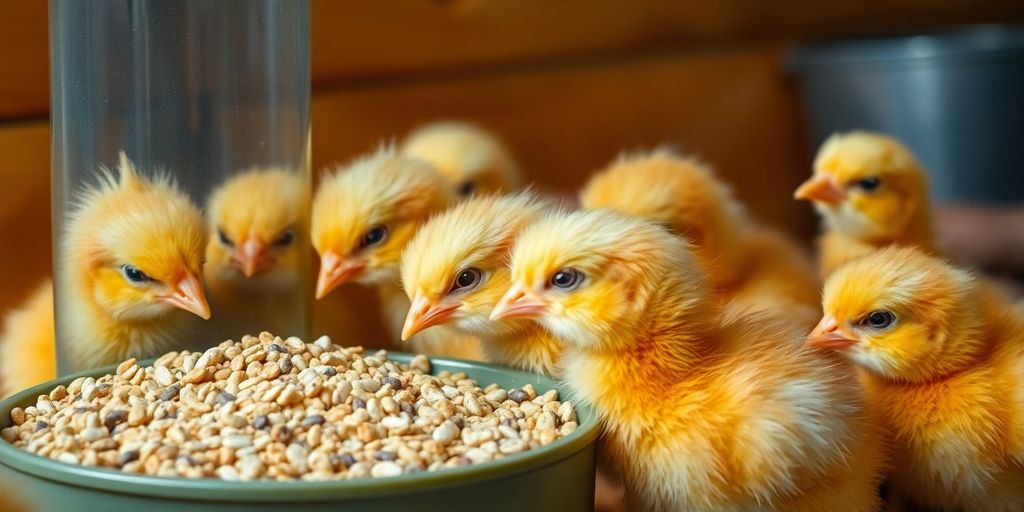
Selecting The Right Starter Feed
Choosing the right starter feed is the first big step. You’ll want to look for something specifically labeled “chick starter.” This stuff is formulated to give them all the nutrients they need in their early weeks. It usually comes in a crumble form, which is easy for them to peck at and digest. I usually grab a bag from the local farm supply store. There are medicated and unmedicated options. Medicated feed can help prevent coccidiosis, which is a common problem in chicks. If you’re getting your chicks from a reputable source and keeping things clean, you might not need it, but it’s something to consider.
Understanding Nutritional Needs
Chicks need a high-protein diet to support their rapid growth. That’s why starter feeds are packed with protein, usually around 20-24%. They also need the right balance of vitamins and minerals. Don’t be tempted to give them treats or scraps too early. Stick to the starter feed for the first few weeks to make sure they’re getting everything they need. You can always supplement later, but start strong. It’s also important to provide enough feeder space so all chicks can access the food without too much competition.
Feeding Schedule Recommendations
Chicks are eating machines! They need constant access to food. Keep their feeders full at all times. Check them a few times a day to make sure they haven’t run out. As they grow, you might need to switch to a bigger feeder. For the first six weeks, aim for 1-2 linear inches of feeder space per chick. After that, increase it to 4 inches. Also, make sure to keep the feeders clean. Nobody wants to eat out of a dirty dish, and chicks are no different.
One thing I’ve learned is that consistent access to clean feed and water is the single most important thing you can do for your chicks. It sounds simple, but it makes a huge difference in their health and growth. Don’t skimp on the basics, and you’ll be well on your way to raising healthy chickens.
Here’s a simple feeding schedule to get you started:
| Age | Feed Type | Notes |
|---|---|---|
| 0-6 Weeks | Chick Starter | Keep feeders full, ensure adequate space. |
| 6-18 Weeks | Chick Grower | Transition gradually, mix with starter feed for a few days. |
| 18+ Weeks | Layer Feed (if applicable) | Introduce layer feed if raising for eggs, provide calcium supplements. |
Remember to always provide fresh, clean water alongside their feed. You can even dip their beaks in the water when you first introduce them to the brooder to show them where it is. This helps prevent dehydration, especially in those first few critical days.
Ensuring Cleanliness And Hygiene
Cleanliness is super important when raising chicks. It’s not just about making things look nice; it’s about keeping your chicks healthy and preventing diseases. Think of their brooder as their first home – you want it to be a safe and healthy place for them to grow.
Regular Cleaning Routines
Establishing a regular cleaning schedule is key to maintaining a healthy environment for your chicks. I usually clean the brooder every other day, but it really depends on how messy your little ones are. Here’s what I do:
- Remove all the chicks from the brooder and place them in a safe, temporary container.
- Take out all the old bedding and dispose of it properly. I use pine shavings, which are pretty absorbent and easy to clean up.
- Scrub the brooder with warm, soapy water. Make sure to rinse it really well to remove any soap residue.
- Let the brooder dry completely before adding fresh bedding and returning the chicks.
It might seem like a lot of work, but trust me, it’s worth it. A clean brooder reduces the risk of bacterial and fungal growth, which can lead to serious health problems for your chicks.
Maintaining Clean Feeders And Waterers
Dirty feeders and waterers can quickly become breeding grounds for bacteria. I clean mine daily to prevent contamination. Here’s my routine:
- Empty any leftover feed from the feeders and discard it. Rinse the feeders with warm water and scrub them with a brush to remove any stuck-on food.
- Wash the waterers with warm, soapy water and rinse them thoroughly. I also like to use a diluted bleach solution (1 part bleach to 10 parts water) to disinfect them once a week. Just make sure to rinse them really, really well after using bleach.
- Refill the feeders with fresh chick starter feed and the waterers with clean water.
Preventing Disease Spread
Preventing disease is way easier than treating it. Besides regular cleaning, here are a few other things I do to minimize the risk of disease spread:
- Always wash your hands before and after handling the chicks or anything in their brooder. This helps prevent the spread of germs from you to the chicks, and vice versa.
- If you have multiple brooders, avoid cross-contamination by using separate cleaning supplies for each one.
- Isolate any sick chicks immediately to prevent the spread of disease to the rest of the flock. Consult with a vet or experienced poultry keeper for advice on treatment.
- Consider using a baby chick waterer to prevent chicks from drowning.
Monitoring Chick Health And Behavior
It’s super important to keep a close eye on your chicks. You want to make sure they’re healthy and happy. This means watching them every day and knowing what’s normal chick behavior. If you catch problems early, you can often fix them before they become serious.
Daily Observations
Make it a habit to check on your chicks multiple times a day. Look for anything out of the ordinary. Are they eating and drinking? Are they moving around actively? Are their droppings normal? Paying attention to these details can give you early warnings of potential health issues.
Here’s a quick checklist of things to observe:
- Activity level: Are they energetic or lethargic?
- Eating and drinking: Are they consuming feed and water?
- Droppings: Are they normal in color and consistency?
- Feather condition: Are their feathers clean and smooth?
- Social interaction: Are they interacting with each other normally?
Identifying Signs Of Distress
Knowing what signs to look for can help you catch problems early. Here are some common signs of distress in chicks:
- Huddling together, even when the temperature is adequate.
- Pasty butt (droppings sticking to their vent).
- Lethargy or weakness.
- Labored breathing or coughing.
- Loss of appetite.
- Unusual vocalizations.
If you notice any of these signs, it’s important to take action quickly. Isolate the affected chick and consult with a vet or experienced poultry keeper. Early intervention can often make a big difference.
Understanding Normal Chick Behavior
Knowing what’s normal for chicks is just as important as recognizing signs of distress. Normal chick behavior includes:
- Active foraging and pecking.
- Dust bathing (if they have access to a dust bath).
- Social interaction and play.
- Sleeping soundly at night.
- Exploring their environment.
Understanding what’s normal for your chicks will help you quickly identify when something is wrong. It’s like knowing your own kids – you just know when they’re not themselves. This knowledge is invaluable for keeping your chicks healthy and thriving. If you notice any unusual behavior, don’t hesitate to investigate further. It’s always better to be safe than sorry when it comes to the health of your chicks. Consider using a red light bulb to help manage pecking behavior.
Providing Adequate Heat And Light
Using Heat Lamps Safely
Okay, so heat lamps are pretty much the standard for keeping chicks warm, but you gotta be careful. The biggest thing is making sure they’re secure. I’ve heard horror stories about lamps falling and starting fires, and nobody wants that. I always use a clamp that’s super heavy-duty and double-check that it’s not going anywhere. Also, keep the lamp away from anything flammable, like bedding or cardboard. I usually aim for about 24-30 inches above the brooder floor, but it depends on the wattage. Speaking of which, a 250-watt bulb is usually good for a small to medium brooder. I also keep a spare bulb on hand because they always seem to burn out at the worst possible time.
Adjusting Temperature Gradually
Chicks need a specific temperature to thrive, especially in their first few weeks. You’re aiming for around 95 degrees Fahrenheit in the first week. But here’s the thing: you can’t just set it and forget it. You need to lower the temperature by about 5 degrees each week. The easiest way to do this is by raising the heat lamp a little bit higher. I also watch the chicks’ behavior. If they’re all huddled together under the lamp, they’re too cold. If they’re spread out and panting, they’re too hot. If they’re milling around happily, you’ve nailed it. Here’s a quick guide:
| Week | Temperature (Fahrenheit) |
|---|---|
| 1 | 95 |
| 2 | 90 |
| 3 | 85 |
| 4 | 80 |
It’s important to remember that these are just guidelines. The actual temperature your chicks need will depend on the ambient temperature and other factors. Always observe your chicks’ behavior and adjust accordingly.
Understanding Light Requirements
Chicks need light, but not too much. For the first few weeks, they need about 24 hours of light a day to help them find food and water. After that, you can start reducing the amount of light to about 14-16 hours a day. This helps them develop a natural sleep cycle. I usually just use a regular light bulb for this, nothing fancy. Some people use colored bulbs, but I haven’t really noticed a difference. Just make sure the light isn’t too bright, or it can stress the chicks out. Also, always provide clean and fresh water away from the heat source.
Introducing Chicks To Their New Home
Bringing your new chicks home is an exciting time! It’s like welcoming new family members, but with feathers. The first few days are crucial for helping them adjust and thrive. Let’s walk through the best ways to make this transition smooth for your little ones.
Acclimating Chicks To Their Environment
When you first get your chicks, don’t just plop them into the brooder and walk away. They’ve likely just experienced a stressful journey, whether from the local farm store or even the post office. The key is to introduce them gradually to their new surroundings.
Here’s a simple process:
- Dim the lights in the brooder slightly. This helps reduce stress.
- Gently take each chick out of the transport box.
- Dip their beaks in the waterer to show them where the water is. This is super important, especially after a long trip.
- Place them near the starter feed so they can easily find it.
- Observe them for the first few hours to make sure they’re exploring and settling in.
Handling Chicks Gently
Chicks are fragile, so handling them with care is a must. Think of them as tiny, delicate eggs with legs. Rough handling can cause stress, injury, or even death. Here are some tips for gentle handling:
- Always wash your hands before and after handling chicks to prevent the spread of germs.
- Scoop them up gently with both hands, supporting their body.
- Avoid squeezing or holding them too tightly.
- Keep handling sessions short, especially in the beginning.
- Supervise children closely when they’re handling chicks.
Creating A Safe Space
Your brooder needs to be a safe haven for your chicks. This means protecting them from drafts, predators, and potential hazards. Here are some things to consider:
- Make sure the brooder is in a secure location, away from other pets or curious children.
- Use a brooder guard (like cardboard or wire mesh) to prevent chicks from escaping.
- Check the brooder regularly for any sharp objects or potential hazards.
- Ensure the bedding is clean and dry to prevent health issues.
A well-prepared brooder is more than just a container; it’s a sanctuary where your chicks can grow, explore, and develop into healthy, happy chickens. Taking the time to set it up properly will pay off in the long run.
Practicing Good Management Techniques
Raising chicks isn’t just about the daily grind; it’s also about setting up systems that help them thrive long-term. Think of it as being a good landlord for your feathered friends. It’s about creating a safe, healthy, and productive environment. Let’s get into some key areas.
Implementing Biosecurity Measures
Biosecurity is all about keeping the bad stuff out and the good stuff in. This means taking steps to prevent diseases from entering your flock and spreading if they do. It’s like having a security system for your chickens. Here are some basic steps:
- Always wash your hands before and after handling chicks or anything in their environment. It sounds simple, but it’s super effective.
- Limit visitors to your chick area. The fewer people coming in and out, the lower the risk of introducing something nasty.
- Have dedicated footwear for the coop. Don’t wear the same shoes you wear in the garden into the chick area.
- Regularly clean and disinfect equipment. Feeders, waterers, and anything else that comes into contact with your chicks should be kept clean.
Keeping Records Of Growth
Keeping track of your chicks’ progress can give you insights into their health and productivity. It doesn’t have to be complicated; a simple notebook or spreadsheet will do. Here’s what you might want to record:
- Hatch dates: Knowing when your chicks hatched helps you track their age and development.
- Weight: Weighing your chicks periodically can help you identify any growth issues early on.
- Feed consumption: Monitoring how much feed your chicks are eating can indicate whether they’re getting enough nutrients.
- Health observations: Note any signs of illness or unusual behavior. Early detection is key to preventing problems.
Engaging With Local Poultry Communities
Don’t go it alone! Connecting with other poultry keepers can be a great way to learn new things, get advice, and share your experiences. Local poultry communities can offer support and resources that you might not find elsewhere. Here’s how to get involved:
- Join a local poultry club or association. These groups often hold meetings, workshops, and other events.
- Attend poultry shows and fairs. These events are a great way to see different breeds of chickens and talk to experienced breeders.
- Connect with other poultry keepers online. There are many online forums and social media groups dedicated to poultry keeping.
By implementing these good management techniques, you’ll be well on your way to raising healthy, happy, and productive chicks. It’s all about being proactive, observant, and willing to learn. Happy chick raising!
Wrapping It Up
Raising baby chicks can be a fun and rewarding journey. Just remember, it’s all about keeping them warm, fed, and clean. Pay attention to their needs and watch their behavior; they’ll tell you if something’s off. It might feel overwhelming at first, but with a little patience and practice, you’ll get the hang of it. Soon enough, you’ll have happy, healthy chickens that will bring joy to your homestead. So, roll up your sleeves and enjoy the process—your chicks are counting on you!
Frequently Asked Questions
What is the best temperature for baby chicks?
Baby chicks need to be kept at about 95 degrees Fahrenheit for the first week. You can lower the temperature by 5 degrees each week as they grow.
How much space do chicks need in their brooder?
Each chick should have about 0.5 to 1 square foot of space in the brooder to move around comfortably.
What should I feed my chicks?
Chicks should have access to a special starter feed that is high in protein. Make sure to choose a feed that meets their nutritional needs.
How often should I clean the brooder?
You should clean the brooder regularly to keep it free of waste and bacteria. Daily cleaning of feeders and waterers is also important.
How can I tell if my chicks are healthy?
Watch for signs like active behavior, eating and drinking regularly, and not huddling under the heat lamp. If they are spread out and socializing, they are likely healthy.
When can I move my chicks outside?
Chicks can usually go outside when they are fully feathered, which is around 6 to 8 weeks old. Make sure the outdoor environment is safe and warm enough.