“This post contains affiliate links. As an Amazon Associate, I earn from qualifying purchases”
If you’re thinking about raising chickens from chicks, you’re in for a fun and rewarding experience. Starting out with baby chicks is a great way to begin your journey into chicken keeping. Not only are they adorable, but they also provide eggs and meat for your household. This guide will walk you through the essential steps to ensure your chicks grow up healthy and happy, from preparation to integrating them into an existing flock.
Key Takeaways
- Set up a proper brooder with heat and bedding before the chicks arrive.
- Monitor chick behavior to ensure they are comfortable and healthy.
- Provide a balanced diet and fresh water to support their growth.
- Keep the brooder clean to prevent diseases and ensure a healthy environment.
- Transition chicks to outdoor living gradually for a smooth adjustment.
Preparation And Supplies
Before your fluffy little friends arrive, it’s important to have everything set up and ready to go. Think of it as preparing a nursery, but for chickens! Getting organized beforehand will make the whole process smoother and less stressful for both you and the chicks. It’s all about creating a safe and comfortable environment from day one. If you ordered chicks online, try to be home the day they arrive. The sooner you get them settled, the better.
Essential Supplies
Okay, let’s talk about the must-haves. You’ll need a brooder, a heat source, bedding, chick feed, and appropriate feeders and waterers. Don’t skimp on these items; they’re the foundation for raising healthy chicks. Here’s a quick rundown:
- Brooder: This is their home for the first few weeks. A plastic tote or even a large cardboard box can work. Make sure it’s draft-free and easy to clean.
- Heat Source: Chicks need warmth, especially in the beginning. A heat lamp or a radiant heat plate are common choices. If you go with a heat lamp, make sure it’s securely attached to avoid accidents.
- Bedding: This goes on the floor of the brooder to absorb moisture and keep things clean. Pine shavings are a popular option, but avoid cedar shavings, as they can be harmful to chicks. You can also use aspen shavings.
- Chick Feed: Specially formulated for growing chicks, this provides the nutrients they need. Make sure it’s easily accessible.
- Feeders and Waterers: Small, chick-sized containers are best. They prevent chicks from falling in and making a mess.
It’s a good idea to have all of these supplies on hand before you bring the chicks home. That way, you can focus on getting them settled in without having to run to the store at the last minute.
Setting Up The Brooder
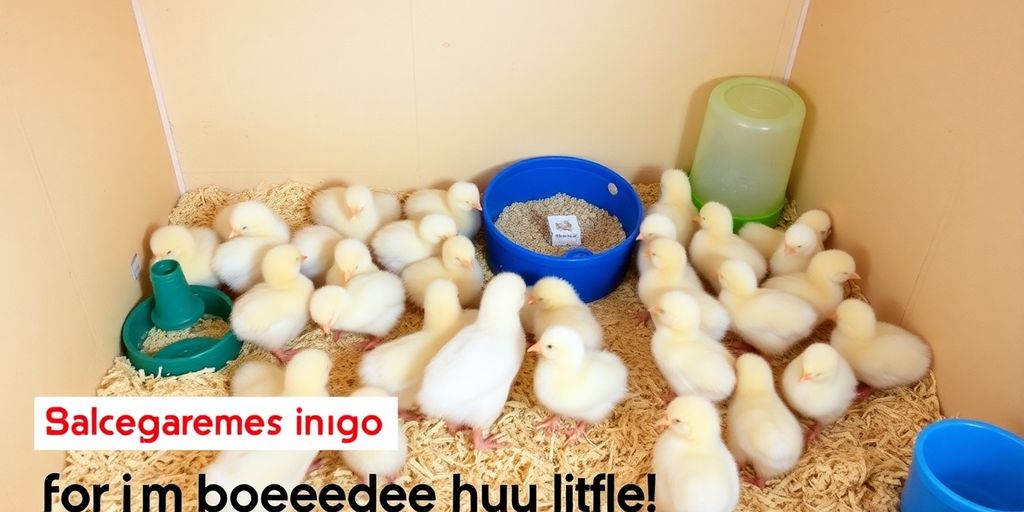
Now, let’s get that brooder ready! First, choose a location that’s protected from drafts and predators. A garage, spare room, or even a corner of your basement can work. Place the brooder in the chosen spot and add the bedding. Next, set up the heat source. If you’re using a heat lamp, hang it securely above the brooder, making sure it’s not too close to the bedding (fire hazard!). If you’re using a heat plate, place it in one area of the brooder, leaving space for the chicks to move away if they get too warm. Add the feeders and waterers, making sure they’re easily accessible to the chicks. Finally, use a thermometer to monitor the temperature inside the brooder. You’ll want to maintain a temperature of around 90-95°F for the first week, gradually decreasing it by 5°F each week until they’re fully feathered. A plastic tote can work as a brooder.
Choosing The Right Location
Where you put your brooder matters. You want a spot that’s safe, secure, and easy to access. Here are a few things to consider:
- Protection from the Elements: Avoid drafty areas or places that are exposed to direct sunlight. Chicks are sensitive to temperature changes, so you want to create a stable environment.
- Predator-Proof: Keep the brooder away from pets or other animals that might try to get to the chicks. A secure room or enclosure is ideal.
- Easy Access: You’ll be spending a lot of time cleaning and maintaining the brooder, so choose a location that’s convenient for you. A garage, basement, or spare room are all good options.
- Ventilation: Make sure the area has good ventilation to prevent the buildup of ammonia from the chicks’ droppings. Open a window or use a fan to circulate the air.
By taking the time to prepare properly, you’ll be setting your chicks up for a healthy and happy start in life. And that’s what it’s all about!
Understanding Chick Behavior
It’s super important to understand how your chicks are acting. This helps you make sure they’re happy and healthy. You’ll start to pick up on their little quirks and what they mean pretty quickly.
Signs Of Comfort
When chicks are comfortable, they’re usually pretty chill. A comfortable chick will explore their surroundings, eat and drink regularly, and generally seem relaxed. Here are some specific things to look for:
- Active Exploration: They’re curious and peck around, checking things out.
- Regular Eating and Drinking: They go to the food and water without hesitation.
- Social Interaction: They hang out with each other, not isolating themselves.
Signs Of Distress
Distress signals can mean something is wrong – maybe they’re too cold, too hot, or not feeling well. You’ll want to address these issues ASAP.
- Huddling: If they’re all bunched together, especially under the heat lamp, they’re probably cold. Adjust the brooder temperature accordingly.
- Panting: If they’re spread out and panting with their beaks open, they’re likely too hot. Move the heat source further away.
- Lethargy: If they’re not moving much or seem weak, something is definitely wrong. Check for other symptoms and consider seeking advice.
Temperature Regulation
Chicks need a specific temperature to thrive, especially in the first few weeks. They can’t regulate their own body temperature very well when they’re tiny. Here’s a basic guide:
Keep a close eye on your chicks’ behavior. They’ll tell you if they’re too hot or too cold. Adjust the heat source as needed to keep them comfortable. Remember, a happy chick is a healthy chick!
| Week | Temperature (°F) |
|---|---|
| 1 | 90-95 |
| 2 | 85-90 |
| 3 | 80-85 |
| 4 | 75-80 |
Feeding Your Chicks
One of the most important aspects of raising healthy chicks is providing them with the right nutrition. Proper feeding ensures they grow strong and develop properly. It’s not just about throwing some feed their way; it’s about understanding their specific needs at each stage of development. Let’s explore the best practices for feeding your new flock.
Choosing The Right Feed
Selecting the correct feed is the first step. You’ll want to start with a chick starter feed, which is specially formulated to meet the nutritional demands of growing chicks.
- Medicated vs. Non-Medicated: Many starter feeds come medicated to help prevent coccidiosis, a common and potentially deadly disease in young chicks. If you prefer to avoid medication, especially if you’re raising chicks for meat, opt for a non-medicated starter feed. Just be extra vigilant about keeping their environment clean to minimize the risk of disease.
- Protein Content: Pay attention to the protein content. Meat birds require a higher protein level than laying hens or dual-purpose breeds. Typically, meat birds need around 23 grams of protein daily for the first three weeks, then tapering down to 20 grams until they are six weeks old. Chick starter feed for laying hens should contain 16-18 grams of protein daily for the first six weeks.
- Ingredients: Look for high-quality ingredients. Avoid feeds with excessive fillers or artificial additives. A good starter feed should be rich in vitamins and minerals to support healthy growth.
Feeding Schedule
Chicks need constant access to food.
- Continuous Feeding: Keep their feeder full at all times. Chicks eat frequently throughout the day, so ensure they never run out of food.
- Feeder Type: Use a chick feeder designed to prevent them from walking in their food and contaminating it. These feeders typically have small openings that only allow their heads to fit through. This helps keep the feed clean and reduces waste.
- Transitioning Feeds: As your chicks grow, you’ll need to transition them to different types of feed. Around 6-8 weeks, switch from medicated starter feed to an unmedicated starter/grower feed. If you’re raising laying hens, transition them to a layer feed around 20 weeks of age, supplementing with oyster shell flakes for extra calcium.
Water Requirements
Water is even more important than food in the first few days. Make sure they drink water first. Always keep them with clean fresh water.
- Clean Water Daily: Fresh, clean water is essential. Change their water at least once a day, or more often if they soil it.
- Waterer Type: Use a chick waterer to prevent them from falling in and drowning. Shallow dishes with pebbles can also work.
- Electrolytes: Consider adding electrolytes to their water for the first week or two, especially if they were shipped. This helps them recover from stress and gives them a boost. You can find electrolyte powders specifically designed for chicks at most farm supply stores.
Keeping their water slightly elevated above the brooder floor will help keep it cleaner. Make sure they can still reach it easily! Some folks like to use chick nipple waterers, similar to what a hamster or rabbit uses. I prefer metal ones as plastic tends to crack and leak. If it’s an open container, baby chicks can fall in and drown.
Maintaining A Healthy Environment
Bedding Options
Choosing the right bedding is super important for your chicks. It’s not just about comfort; it’s about their health. You’ve got a few options, and each has its pros and cons. Pine shavings are a popular choice because they’re absorbent and relatively inexpensive. Just make sure they’re not cedar shavings, as those can be harmful to chicks. Straw is another option, but it’s not as absorbent as pine shavings and can get moldy if it’s not kept dry. Avoid using newspaper or cardboard as a sole bedding material because they become slippery when wet, which can lead to leg problems in chicks. I’ve found that a mix of pine shavings and chopped straw works pretty well, giving you decent absorbency and some added bulk. Remember to keep an eye on the bedding and replace it regularly to prevent the buildup of ammonia, which can cause respiratory issues.
Cleaning The Brooder
Okay, let’s be real: chicks are messy. They poop a lot. Keeping their brooder clean is non-negotiable if you want healthy, happy chicks. I usually spot-clean the brooder daily, removing any soiled bedding and replacing it with fresh stuff. Then, once a week, I do a full clean-out, removing all the bedding, scrubbing the brooder with a mild disinfectant, and letting it dry completely before adding fresh bedding. This helps prevent the spread of disease and keeps the ammonia levels down. Trust me, your nose will thank you. Clean feed and water containers daily too, to prevent bacteria growth.
Preventing Diseases
Preventing diseases in chicks is all about creating a healthy environment and being proactive. Here’s what I do:
- Quarantine new chicks: Before introducing new chicks to your existing flock (or even to each other), keep them separate for a couple of weeks to make sure they’re not carrying any diseases. This is super important!
- Maintain good hygiene: Regularly clean the brooder, feeders, and waterers to prevent the buildup of bacteria and other pathogens. Wash your hands thoroughly after handling chicks or anything in their brooder.
- Provide proper nutrition: Feed your chicks a high-quality chick starter feed that meets their nutritional needs. A healthy diet helps boost their immune system and makes them more resistant to disease.
One thing I learned the hard way is to watch out for pasty butt, especially in the first week. It’s when their droppings stick to their vent and can block it up. If you see it, gently clean it off with a warm, damp cloth. Ignoring it can be fatal, so check those little chickie bums regularly!
Transitioning To Outdoor Living
Okay, so your chicks are getting bigger, and that brooder is starting to feel real small, right? It’s time to think about moving them outside. But hold on, you can’t just plop them into the chicken coop and call it a day. There’s a bit more to it than that.
When To Move Outside
This is a big question, and the answer depends on the weather and how feathered your chicks are. Generally, you want them to be fully feathered and the outside temperature to be consistently above 65 degrees Fahrenheit. If they still have a lot of downy fluff, they won’t be able to regulate their body temperature well enough to handle cooler nights. Keep an eye on the forecast and be patient. It’s better to wait a little longer than to move them out too soon and risk them getting sick.
Creating A Safe Coop
Your coop needs to be more than just a pretty building. It needs to be a fortress against predators, a haven from the elements, and a comfortable home for your flock. Here’s a quick checklist:
- Secure Fencing: Make sure your run is enclosed with sturdy wire mesh that goes at least a foot into the ground to prevent digging predators.
- Solid Roof: Protect your chickens from rain, snow, and the hot sun with a solid roof over at least part of the run.
- Adequate Space: Overcrowding leads to stress and disease. Aim for at least 4 square feet per chicken inside the coop and 8-10 square feet per chicken in the run.
- Roosts: Chickens like to roost at night, so provide sturdy roosting bars that are easy to grip.
- Nesting Boxes: If you’re raising hens for eggs, provide nesting boxes in a quiet, dark corner of the coop. One nesting box for every 3-4 hens is usually sufficient.
Think of your coop as your chickens’ home. You want it to be safe, comfortable, and functional. A little extra effort in the beginning will pay off in the long run with healthy, happy chickens.
Acclimating To New Surroundings
Moving to a new place is stressful, even for chickens. Here’s how to make the transition as smooth as possible:
- Start with short visits: Let the chicks explore the coop and run for a few hours each day before putting them in there full-time. This gives them a chance to get used to the new sights, sounds, and smells.
- Provide familiar comforts: Put their old brooder bedding in the coop to help them feel more at home. You can also hang a familiar toy or object in the run.
- Supervise their first few nights: Make sure they’re able to find their way into the coop at dusk and that they’re roosting comfortably. You may need to gently guide them in the first few nights.
Moving your chicks outside is a big step, but with careful planning and a little patience, you can make it a positive experience for everyone. And soon, you’ll be enjoying fresh eggs from your own backyard flock! Don’t forget to check out some tips for spring gardening while you’re at it!
Monitoring Growth And Development
It’s super important to keep a close eye on your chicks as they grow. This stage is all about making sure they’re developing properly and staying healthy. Regular observation will help you catch any potential problems early on.
Growth Milestones
Tracking your chicks’ growth is a good way to ensure they’re on the right track. Here’s what to look for:
- Weight: Weigh your chicks weekly to make sure they’re gaining weight appropriately. A kitchen scale works just fine. Keep a record so you can spot any sudden drops or plateaus.
- Feather Development: Watch how their feathers come in. They should start getting their first real feathers around a week old, and be mostly feathered out by 6-8 weeks. Uneven or slow feathering can be a sign of nutritional deficiencies or other health issues.
- Size: Note their overall size and body proportions. They should be growing steadily, without looking too skinny or too plump.
Behavioral Changes
Changes in behavior can tell you a lot about how your chicks are doing.
- Activity Levels: Are they active and curious, or lethargic and withdrawn? Healthy chicks are usually busy exploring and interacting with each other.
- Eating Habits: Are they eating and drinking normally? A sudden loss of appetite can be a sign of illness. Make sure they have access to the right feed at all times.
- Social Interactions: How do they interact with each other? Are they pecking at each other excessively, or do they seem to get along well? Bullying can be a problem, especially in crowded conditions.
Health Checks
Regular health checks are a must. Here’s what to look for:
- Eyes and Nose: Check for any discharge or swelling. Clean, clear eyes and a dry nose are signs of good health.
- Droppings: Monitor their droppings. Healthy droppings should be firm and brown with a white cap. Watery or discolored droppings can indicate a problem.
- Legs and Feet: Look for any signs of limping or swelling. Check their feet for any sores or injuries.
Keeping a journal or log can be really helpful. Jot down their weight, feather development, any behavioral changes, and the results of your health checks. This will give you a clear picture of their progress and help you spot any potential problems early on. It doesn’t have to be fancy, just a simple notebook will do.
Integrating New Chicks Into An Existing Flock
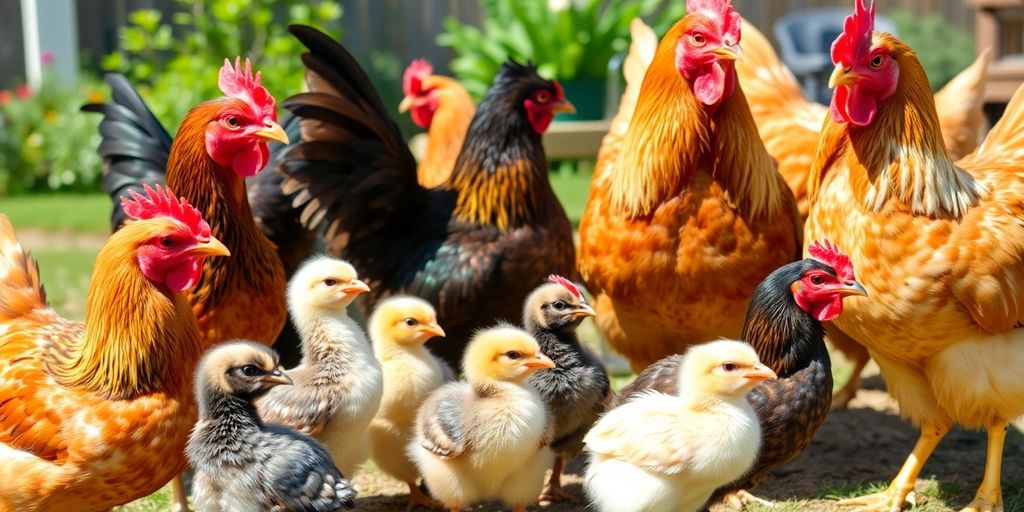
Introducing new chicks to an established flock can be tricky. Chickens have a natural pecking order, and adding new members can disrupt this, leading to potential conflicts. The key is to take it slow and steady, prioritizing the safety and well-being of both the new chicks and the existing flock.
Quarantine Procedures
Before even thinking about introducing your new chicks, quarantine is a must. Keep them completely separate from your existing flock for at least 30 days. This helps prevent the spread of any potential diseases. You don’t want to risk your whole flock getting sick! Make sure you’re providing the right feed and water during this time.
Gradual Introduction
Once the quarantine period is over, start with visual introductions. Place the chicks in a secure pen or crate within sight of the existing flock. This allows them to get used to each other’s presence without direct contact. You can even section off part of the run using chicken wire to create a safe space for the chicks. This lets them interact through the barrier. Supervise these interactions closely to ensure no one is getting overly stressed or aggressive.
Here’s a possible timeline for introductions:
| Week | Activity |
|---|---|
| 1-2 | Visual contact through a barrier |
| 3-4 | Supervised free-ranging time together |
| 5+ | Full integration into the main coop/run |
Monitoring Interactions
Even after full integration, keep a close eye on your chickens. Some squabbles are normal as they establish a new pecking order, but watch out for excessive bullying or injuries. Make sure there are plenty of roost space and access to food and water to minimize competition. If you see a chick being constantly picked on, you may need to separate it temporarily and reintroduce it later.
Remember, patience is key. Integrating new chicks takes time and careful observation. By following these steps, you can help ensure a smooth and stress-free transition for everyone involved.
Wrapping It Up
So, there you have it! Raising baby chicks can be a fun and rewarding journey. Just remember, it takes some time and patience. You’ll need to keep an eye on their needs, from warmth to food and water. Don’t stress if things don’t go perfectly at first; everyone learns as they go. Enjoy the little moments with your chicks, and soon enough, you’ll have a lively flock to call your own. Happy chicken keeping!
Frequently Asked Questions
What supplies do I need to raise baby chicks?
You will need a brooder, heat lamp, bedding, food, and water. A brooder is a safe space for the chicks to live in until they are ready to go outside.
How can I tell if my chicks are comfortable?
If your chicks are comfortable, they will be spread out and moving around. If they huddle together or stay close to the heat lamp, they might be cold.
What should I feed my baby chicks?
Baby chicks need a special starter feed that helps them grow strong. Make sure to provide fresh water every day too.
When can I move my chicks outside?
You can start moving your chicks outside when they are about six weeks old, but make sure the weather is warm enough.
How do I keep my chicks healthy?
Keep their living area clean, provide fresh food and water, and watch for any signs of sickness. Regular health checks are important.
How do I introduce new chicks to an existing flock?
It’s best to quarantine new chicks for a few weeks before introducing them. Then, slowly mix them with the older chickens while watching their interactions.