“This post contains affiliate links. As an Amazon Associate, I earn from qualifying purchases”
Raising baby chicks can be a fun and rewarding adventure, but it can also feel a bit overwhelming if you’re new to it. From setting up their first home to ensuring they grow up healthy, there are a lot of details to keep in mind. This guide will walk you through the basics of how to raise chicken from day old, making sure you and your new feathered friends have a smooth start together.
Key Takeaways
- Set up a safe and warm brooder for your chicks.
- Provide them with quality starter feed and fresh water.
- Monitor their health and behavior regularly.
- Make sure their environment is comfortable and secure.
- Transition them to outdoor living gradually.
Setting Up The Brooder
Okay, so you’re getting chicks! Exciting times. First things first, you need a brooder. Think of it as their nursery for the first few weeks. It’s gotta be safe, warm, and big enough for them to move around. Let’s get into the details.
Choosing The Right Size
Size matters, especially when it comes to chicks. They grow fast, like, really fast. What seems like plenty of space now will be cramped in a week or two. A good rule of thumb is to aim for at least 0.5 to 1 square foot per chick initially. You can always expand later, but starting with enough space reduces stress and helps prevent problems like feather picking. Overcrowding can lead to all sorts of issues, so don’t skimp on space. You can use a large cardboard box, a plastic tub, or even section off an area of your garage. [Brooder setup](#7160] can be done in various ways, so pick what works for you.
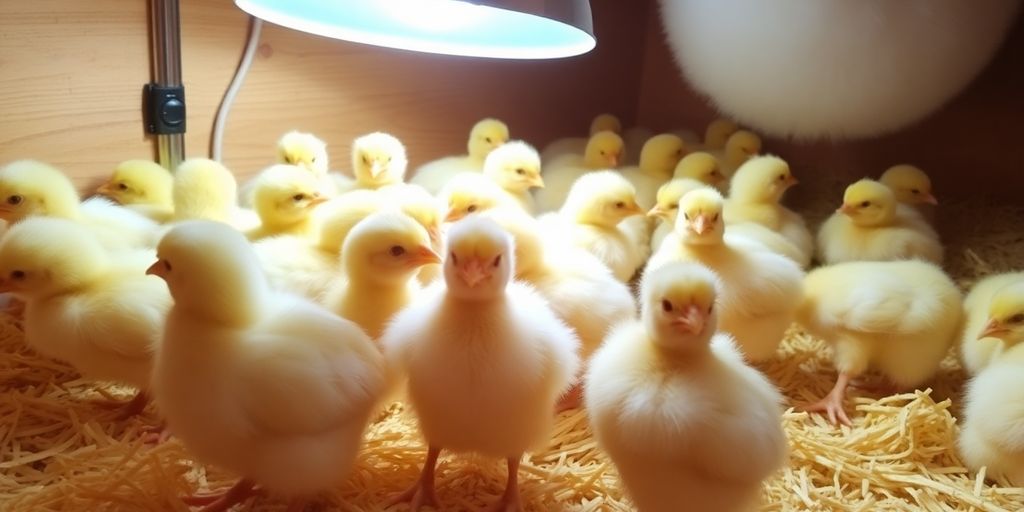
Maintaining Temperature
Temperature is absolutely critical. Chicks can’t regulate their own body temperature for the first couple of weeks, so you have to do it for them. The goal is to keep the brooder nice and toasty, but not too hot.
Here’s a quick guide:
- Week 1: 90-95°F (32-35°C)
- Week 2: 85-90°F (29-32°C)
- Week 3: 80-85°F (27-29°C)
- Week 4: 75-80°F (24-27°C)
- Week 5: 70-75°F (21-24°C)
Most people use a heat lamp, but you can also use a radiant heat panel. Just make sure whatever you use is safe and secure. Keep a thermometer in the brooder at chick level to monitor the temperature. If the chicks are huddled together under the heat source, they’re too cold. If they’re spread out and panting, they’re too hot. Adjust the height of the lamp or the wattage of the bulb to get it just right.
It’s important to provide a temperature gradient in the brooder. This means having a warmer area under the heat source and a cooler area away from it. This allows the chicks to move around and regulate their own body temperature as needed.
Bedding Options
Choosing the right bedding is important for keeping the brooder clean and dry. There are several options, each with its pros and cons.
Here are a few popular choices:
- Pine shavings: A classic choice. Absorbent and relatively inexpensive. Just make sure they’re not cedar shavings, which can be harmful to chicks.
- Chopped straw: Another good option, especially if you’re looking for something more natural. It’s not quite as absorbent as pine shavings, but it works well.
- Paper towels: Great for the first few days. They’re easy to clean and prevent chicks from eating the bedding. After a few days, switch to something more absorbent.
Avoid using newspaper alone, as it can be slippery and cause leg problems. Whatever you choose, make sure to change the bedding regularly to keep the brooder clean and dry. Nobody wants to live in a dirty house, and neither do your chicks! Cleanliness is VERY important at this stage.
Feeding Your Chicks
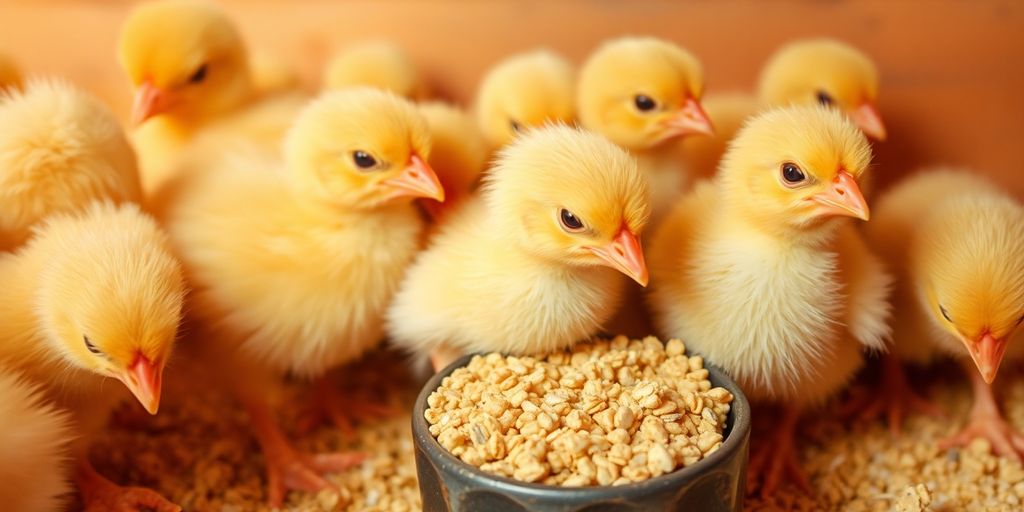
Selecting Starter Feed
Choosing the right starter feed is super important for your chicks’ growth. Look for a feed specifically formulated for chicks, often labeled as “chick starter” or “chick starter/grower.” These feeds are designed to provide all the nutrients baby chicks need in their first few weeks. You’ll find both medicated and non-medicated options. Medicated feed contains a small amount of amprolium, which helps prevent coccidiosis, a common and potentially deadly disease in young chicks. Even if you choose medicated feed, keeping the brooder clean is still a must. Chick starter feed is a complete food, so you don’t need to supplement with anything else unless you’re giving treats (more on that later!).
Providing Fresh Water
Fresh, clean water is just as important as food. Make sure your chicks always have access to it. Use a shallow dish or a chick waterer to prevent them from drowning. Those little guys are clumsy! Some people put marbles or pebbles in the water to make it even safer. Clean the waterer daily to prevent the growth of bacteria and algae. Place the waterer away from the heat lamp to keep the water cool and fresh. It’s also a good idea to show the chicks where the water is by gently dipping their beaks in it when you first introduce them to the brooder. Remember to use clean egg cartons as initial feeders.
Understanding Nutritional Needs
Chicks have different nutritional needs as they grow. For the first six to eight weeks, they need a starter feed with a high protein content (around 20-24%). This helps them grow strong and healthy. After that, you can switch to a grower feed with a slightly lower protein content (around 16-18%). Always check the feed bag for specific recommendations. You can start giving them small amounts of treats after the first week or two, but treats should only make up a small portion of their diet. Offer treats like mealworms, chopped greens, or fruit in moderation. If you give treats, provide chick grit or coarse sand to help them digest the new food.
It’s easy to get caught up in wanting to spoil your chicks with treats, but remember that their starter feed is carefully formulated to meet all their nutritional needs. Treats should be considered a supplement, not a replacement for their regular feed. Overfeeding treats can lead to nutritional imbalances and health problems.
Providing enough feeder space is also important. During the first six weeks, aim for 1-2 linear inches of feeder space per chick. After that, increase it to 4 linear inches. This ensures that all the chicks have access to food and reduces competition.
Monitoring Chick Health
Daily Observations
Okay, so you’ve got your chicks settled in. Now comes the part where you play detective. Daily observation is key to spotting potential problems early. I usually spend at least 10-15 minutes just watching them. Are they active? Are they eating and drinking? Are they moving around normally, or are some lagging behind?
Here’s what I look for:
- Activity Level: Are they energetic and curious, or lethargic?
- Eating and Drinking: Are all the chicks eating and drinking regularly?
- Droppings: Are the droppings normal in color and consistency? (Abnormal droppings can indicate illness.)
- Behavior: Are they pecking at each other excessively (a sign of stress or overcrowding)?
Identifying Signs Of Stress
Chicks can get stressed pretty easily, and a stressed chick is a sick chick waiting to happen. Recognizing the signs of stress is super important. Here are a few things I’ve learned to watch out for:
- Huddling: If the chicks are constantly huddled together, even when the temperature is right, they might be stressed or ill. Remember to check your brooder temperature regularly.
- Panting: Panting (with their beaks open) can indicate that they’re too hot.
- Feather Picking: As mentioned before, this is a big sign of stress or overcrowding. Make sure they have enough brooder space.
- Changes in Appetite: A sudden decrease in appetite can be a sign that something’s wrong.
Stress in chicks can stem from various factors, including temperature fluctuations, overcrowding, poor ventilation, or changes in their environment. Addressing these stressors promptly is crucial for maintaining a healthy flock.
Maintaining Cleanliness
Cleanliness is next to godliness, especially when it comes to raising chicks. A dirty brooder can quickly become a breeding ground for bacteria and disease. I try to follow these steps:
- Daily Spot Cleaning: Remove any wet or soiled bedding daily. I use a small scoop to make this quick and easy.
- Regular Waterer Cleaning: Clean and refill the waterer at least once a day (more often if it gets dirty). This prevents the spread of bacteria.
- Complete Brooder Cleanout: Once a week, I completely empty the brooder, disinfect it with a poultry-safe cleaner, and replace all the bedding. This helps to keep everything fresh and clean. Don’t forget to wash your hands after handling chicks!
Creating A Comfortable Environment
Creating a comfortable environment is super important for your chicks’ well-being. It’s not just about keeping them alive; it’s about helping them thrive. Think of it as setting up a cozy little apartment for them, where they feel safe, warm, and have everything they need. A happy chick is a healthy chick, and a healthy chick grows into a productive hen. So, let’s get into the details of how to make your brooder a chick paradise.
Temperature Control
Temperature is probably the most critical factor in a brooder. Baby chicks can’t regulate their own body temperature for the first few weeks, so they rely on you to provide the right amount of warmth. The general rule is to start at 92-95°F (33-35°C) for the first week and then reduce the temperature by 5 degrees each week until they are fully feathered or the ambient temperature is warm enough. You can use a heat lamp, a radiant heat panel, or even a ceramic heat emitter. The key is to monitor the chicks’ behavior. If they are huddled together under the heat source, they are too cold. If they are spread out and panting, they are too hot. Adjust the heat accordingly.
Space Requirements
Chicks grow fast, so you need to make sure they have enough space. Overcrowding can lead to stress, which can weaken their immune systems and make them more susceptible to disease. As a general guideline, provide at least 0.5 square feet of space per chick for the first few weeks, and then increase it to 1 square foot per chick as they grow. A good way to tell if they need more space is if they start pecking at each other or if the brooder starts to smell bad despite regular cleaning. Time to upgrade to a bigger setup!
Draft Protection
Drafts can be deadly for baby chicks. Even a slight breeze can cause them to get chilled, which can lead to illness or even death. Make sure your brooder is located in a draft-free area, away from windows and doors. You can also use cardboard or plastic sheeting to block any drafts. But, don’t completely seal off the brooder, as you need to allow for proper ventilation. Fresh air is important for preventing the buildup of ammonia and other harmful gases. It’s a balancing act, but it’s worth it to keep your chicks healthy and happy.
Creating a comfortable environment for your chicks is an ongoing process. You need to constantly monitor their behavior and adjust the temperature, space, and ventilation as needed. It’s a bit like being a parent – you’re always learning and adapting to your chicks’ needs. But, with a little bit of care and attention, you can create a brooder that is a safe, healthy, and happy home for your new feathered friends.
Introducing Chicks To Their New Home
Acclimating Chicks
So, you’ve got your brooder all set up, temperature is perfect, and you’re ready to bring in the new flock. Awesome! But hold on, don’t just dump them in there. Acclimating chicks properly is super important for their well-being. Think of it like moving to a new country – a little bit of preparation goes a long way.
- First, dim the lights in the brooder a bit. This helps reduce stress as they adjust.
- Gently take each chick out of its transport box and place it near the water source. This encourages them to find it quickly.
- Observe them closely for the first few hours. Are they huddled together? Too far from the heat? Adjust accordingly.
Handling Techniques
Okay, let’s talk about how to actually handle these little fluffballs. They’re cute, yes, but also fragile. You don’t want to accidentally hurt them.
- Always wash your hands before and after handling chicks. This helps prevent the spread of germs.
- When picking up a chick, gently scoop it up with both hands, supporting its body. Avoid grabbing them by their legs or wings.
- Keep handling sessions short, especially in the beginning. They need time to rest and adjust.
First Day Care
The first 24 hours are critical. It’s all about making sure they have everything they need and are settling in well. You can find more information about poultry care online.
- Make sure each chick finds the water and feed. Gently dip their beak in the water to show them where it is.
- Check the temperature regularly. Use a thermometer at chick level to ensure it’s within the recommended range.
- Remove any soiled bedding promptly to maintain a clean environment.
It’s normal for chicks to be a little stressed during their first day. They’ve just been through a big change! Just keep an eye on them, provide what they need, and they’ll usually settle in just fine. If you notice any serious issues, like lethargy or difficulty breathing, consult a vet.
Ensuring Safety And Security
Okay, so you’ve got your chicks, they’re eating, drinking, and generally being adorable. But don’t get complacent! Keeping them safe is a big deal, and it’s not just about keeping them warm. We’re talking about protecting them from predators, diseases, and even themselves. It’s a bit like being a helicopter parent, but for chickens.
Predator Protection
Predators are a real threat, especially when your chicks are small and vulnerable. Raccoons, foxes, hawks, and even domestic dogs and cats can pose a danger. Make sure your brooder is completely secure. If it’s outside, cover it with a wire mesh that’s strong enough to keep predators out. Even indoors, a curious cat can cause serious stress to your chicks. Here are some things to consider:
- Check the perimeter of your brooder daily for any signs of digging or tampering.
- Use hardware cloth instead of chicken wire, as it’s much stronger and more durable.
- If you have outdoor access, consider a secure run with a covered top.
Biosecurity Measures
Disease can wipe out a whole flock of chicks in no time. It’s really important to practice good biosecurity. This means taking steps to prevent diseases from entering your brooder and spreading among your chicks.
- Always wash your hands before and after handling your chicks or anything in their brooder.
- Use separate shoes or boots when entering the brooder area to avoid tracking in contaminants.
- Quarantine any new chicks for at least 30 days before introducing them to your existing flock. This helps prevent the spread of disease if the new chicks are carrying something.
Biosecurity isn’t just about protecting your chicks; it’s about protecting the entire poultry population in your area. By taking simple precautions, you can help prevent the spread of devastating diseases.
Safe Housing Options
The type of housing you choose plays a big role in your chicks’ safety. A well-designed brooder will protect them from the elements, predators, and injuries. Here are a few options to consider:
- DIY Brooder: A simple cardboard box or plastic tub can work well for the first few weeks. Just make sure it’s large enough for the chicks to move around comfortably and has adequate ventilation. You can find starter feed at most farm supply stores.
- Commercial Brooder: These are specifically designed for raising chicks and often come with features like built-in heat lamps and adjustable ventilation. They can be a bit more expensive, but they offer a convenient and safe option.
- Modified Hutch: An old rabbit hutch or dog crate can be repurposed into a brooder with a few modifications. Just make sure to clean and disinfect it thoroughly before use and add a secure wire mesh cover.
Here’s a quick comparison table:
| Feature | DIY Brooder | Commercial Brooder | Modified Hutch |
|---|---|---|---|
| Cost | Low | Moderate to High | Low to Moderate |
| Security | Moderate | High | Moderate to High |
| Convenience | Low | High | Moderate |
| Portability | High | Moderate | Moderate |
| Ease of Cleaning | Low | Moderate | Moderate |
Transitioning To Outdoor Living
Getting chicks out of the brooder and into their coop is a big step. You want to pick the right moment, have the coop set up just right, and ease them in without stress.
Timing The Move
Chicks usually need 4 to 6 weeks before they can handle the great outdoors. At this point, they should have most of their adult feathers and be able to stay warm down to about 55°F.
| Age (weeks) | Feathering | Safe Low Temp |
|---|---|---|
| 4 | About 75% | 60°F |
| 5 | Nearly full | 57°F |
| 6 | Full | 55°F |
Move them only when they’re fully feathered and the weather stays mild.
Preparing The Coop
Before you let chicks loose, give your coop a once-over:
- Seal gaps and holes to keep out predators.
- Clean and refill feeders and waterers.
- Add roosts about 12 inches off the floor so they can perch.
- Check nesting boxes for the right size and soft bedding.
Also sweep out any old droppings and replace bedding so everything feels fresh.
A smooth transition means less peeping at night. Make sure things are clean, dry, and safe before the first big move.
Gradual Introduction
Don’t just open the door and let them go. Bring chicks outside in gentle stages:
- Pick a calm, sunny afternoon when the coop is ready.
- Lead them outside for short sessions, about an hour at first—offer feed and water right there.
- Over the next week, stretch those visits until they stay out all day.
- Watch for any signs of panic or pecking and step in if needed.
During these short sessions, you’ll see how they explore and adjust. Keep an eye on weather and always have fresh water on hand.
Wrapping It Up
Raising baby chicks can be a fun and rewarding journey. Sure, it might feel a bit overwhelming at first, but with the right setup and care, you’ll be just fine. Remember to keep their brooder cozy, provide fresh food and water, and watch them closely as they grow. It’s all about creating a safe space for them to thrive. Don’t hesitate to reach out to other chicken owners or resources if you have questions. Enjoy the process, and soon enough, you’ll have a flock of happy hens clucking around your yard!
Frequently Asked Questions
What is a brooder and why do I need one?
A brooder is a special place where baby chicks live when they are young. It keeps them warm and safe until they can live outside.
How do I keep my chicks warm?
You can use a heat lamp to keep the temperature in the brooder between 92-95°F. Make sure to check the temperature often.
What should I feed my chicks?
You should feed your chicks a special starter feed that is made just for them. They need this to grow strong and healthy.
How can I tell if my chicks are healthy?
Look for signs like active behavior and good eating. If they are huddling together or staying away from the heat, they might be too cold or too hot.
When can I move my chicks outside?
You can move your chicks outside when they are about 6 weeks old and the weather is warm enough. Make sure their coop is ready!
How do I protect my chicks from predators?
Make sure their coop is secure and check for any holes or weak spots. Always keep an eye on them when they are outside.