“This post contains affiliate links. As an Amazon Associate, I earn from qualifying purchases”
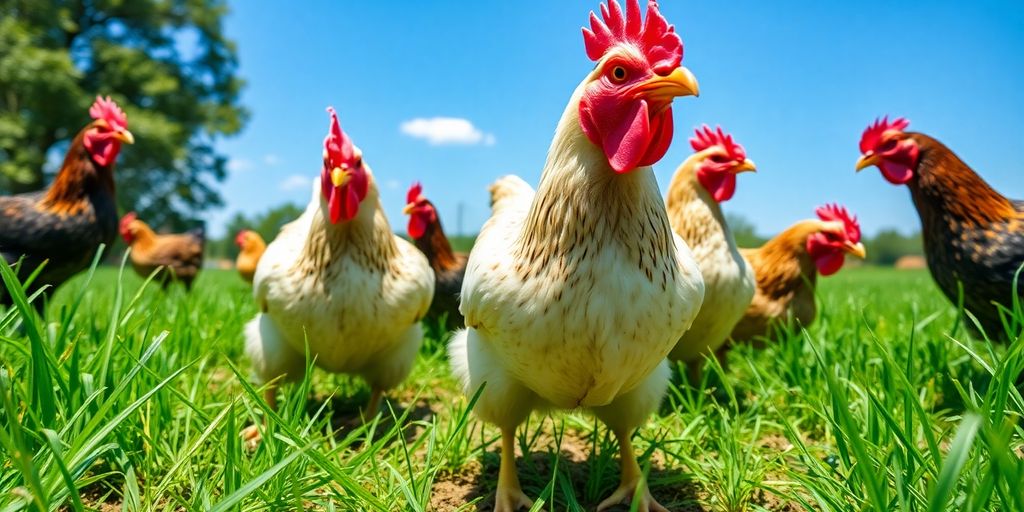
Raising chickens for meat can be a fulfilling and rewarding venture. Not only does it provide you with fresh, homegrown protein, but it also gives you control over how your food is raised. Whether you’re a beginner or have some experience, this guide will walk you through the essential steps and tips on how to raise chicken for meat successfully. From choosing the right breed to processing your birds, we’ve got you covered!
Key Takeaways
- Start by selecting the right breed of chicken suited for meat production.
- Create a safe and comfortable brooder area for your chicks.
- Proper nutrition is key; choose the right feed and stick to a schedule.
- Monitor your chickens for health issues and implement preventative care.
- Learn the butchering process to make the most of your meat chickens.
Getting Started With Raising Meat Chickens
Before you even think about those delicious drumsticks, there’s some groundwork to cover. Raising meat chickens isn’t rocket science, but it does require a bit of planning and preparation. It’s not just about tossing some chicks in a coop and hoping for the best. Let’s get into it.
Choosing the Right Chicken Breed
Okay, so you want meat. That means you need to pick a breed that’s actually good for, well, meat. Cornish crosses are the most popular choice for meat production because they grow super fast. But there are other options too, like the slower-growing but flavorful Freedom Rangers or the dual-purpose breeds like Wyandottes. Here’s a quick rundown:
- Cornish Cross: Fast growth, high feed conversion, but can have leg problems due to rapid weight gain.
- Freedom Ranger: Slower growth than Cornish Cross, better foraging ability, good flavor.
- Dual-Purpose Breeds (e.g., Wyandotte, Plymouth Rock): Slower growth, decent meat yield, also lay eggs.
Consider what’s important to you. Do you want the fastest turnaround time, or are you willing to wait a bit longer for better flavor and healthier birds? Also, think about your climate. Some breeds handle heat better than others.
Setting Up a Suitable Brooder Area
Your baby chicks need a safe, warm, and dry place to start their lives. This is where the brooder comes in. A brooder is basically a chick nursery. You can use a large cardboard box, a plastic tub, or even a purpose-built brooder from a farm supply store. The important thing is that it’s draft-free and easy to clean. You’ll need:
- Heat Source: A heat lamp is the most common option. Make sure it’s securely attached and not a fire hazard. Keep an eye on the chicks’ behavior to adjust the height of the lamp. If they’re huddled together under the lamp, they’re too cold. If they’re spread out and panting, they’re too hot.
- Bedding: Pine shavings are a good choice. Avoid cedar shavings, as they can be harmful to chicks. Replace the bedding regularly to keep it clean and dry.
- Feeder and Waterer: Use chick-sized feeders and waterers to prevent the chicks from drowning or making a mess. Raise them as the chicks grow to keep them clean.
Remember, cleanliness is key. Dirty brooders can lead to disease outbreaks, so clean it regularly. I usually do a full clean-out every few days.
Selecting Quality Chicks
Where you get your chicks matters. You want healthy, vigorous chicks that are free from disease. Here are your options:
- Hatchery: Large hatcheries are a good option if you need a lot of chicks. They usually have good biosecurity measures in place, but it’s always a good idea to ask about their health protocols.
- Local Breeder: Buying from a local breeder can be a great way to support your community and get chicks that are well-adapted to your local climate. Plus, you can usually see the parent birds and get a better sense of the chicks’ quality.
- Feed Store: Many feed stores sell chicks in the spring. This can be a convenient option, but make sure you know where the chicks came from and that they look healthy.
When you get your chicks, look for these signs of good health:
- Bright, alert eyes
- Clean vent (no pasty butt)
- Active and moving around
- No signs of respiratory distress (coughing, sneezing)
If you’re raising poultry on pasture, make sure your chicks are strong enough to handle the transition outdoors once they’re feathered out. Starting with quality chicks sets you up for success in the long run.
Housing and Equipment Essentials
Alright, so you’re getting serious about raising meat chickens. That’s awesome! But before you bring those little fluffballs home, you gotta make sure they have a safe and comfy place to live. Think of it as building a tiny chicken paradise. It’s not just about throwing them in any old shed; it’s about setting them up for success. Let’s break down the essentials.
Designing a Coop
Okay, so the coop is like the chicken’s house, right? It needs to be secure, well-ventilated, and easy to clean. A good coop protects your flock from predators and the elements. You don’t want your chickens getting eaten by foxes or freezing in the winter.
Here’s what I think about when designing a coop:
- Size Matters: Don’t cram too many birds into a small space. They need room to move around, stretch their wings, and just generally be chickens. Overcrowding leads to stress and can cause health problems. Aim for at least 4 square feet per bird inside the coop and 8-10 square feet in the outdoor run.
- Ventilation is Key: Chickens produce a lot of moisture, and that can lead to respiratory issues. Make sure your coop has good ventilation to keep the air fresh and dry. Windows or vents near the roof are a good idea. But avoid drafts!
- Easy Cleaning: You’re gonna be cleaning this thing regularly, so make it easy on yourself. A coop with a removable floor or easy access for shoveling makes life so much easier. Trust me on this one.
- Security: This is huge. You need to protect your chickens from predators. Bury wire mesh around the perimeter of the coop and run to prevent digging. Use strong latches on all doors and windows. Consider adding an electric fence for extra protection. Good fencing is a must.
I once built a coop without proper ventilation, and my chickens were miserable. They were constantly sneezing and coughing, and I ended up having to tear the whole thing down and start over. Learn from my mistakes!
Essential Equipment for Raising Meat Chickens
Beyond the coop itself, you’ll need some basic equipment to keep your chickens happy and healthy. Think of it as the chicken equivalent of furniture and appliances.
- Brooder: If you’re starting with chicks, you’ll need a brooder to keep them warm and safe for the first few weeks. This can be as simple as a cardboard box with a heat lamp. Make sure it’s big enough for the chicks to move around and has good ventilation.
- Feeders and Waterers: You’ll need feeders and waterers that are appropriate for the size of your chickens. Start with small ones for chicks and upgrade to larger ones as they grow. I like to use feeders and waterers that are easy to clean and prevent spillage. A heat source is also important for chicks.
- Heat Lamp: Chicks need a heat source to stay warm, especially in the first few weeks. Use a heat lamp with a reflector to direct the heat downwards. Make sure to hang it securely and monitor the temperature closely. You don’t want to cook your chicks!
- Roosts: Chickens like to roost at night, so provide them with some roosting bars. These can be as simple as wooden dowels or branches. Place them at different heights to give your chickens some variety.
Ensuring Proper Ventilation and Temperature Control
Ventilation and temperature control are super important for keeping your chickens healthy and productive. Too hot, and they’ll be stressed and uncomfortable. Too cold, and they’ll be shivering and susceptible to illness.
Here’s how I manage ventilation and temperature:
- Ventilation: As I mentioned before, good ventilation is key. Make sure your coop has windows or vents that can be opened and closed to adjust the airflow. In the summer, open them up to keep the coop cool. In the winter, close them partially to retain heat.
- Temperature Control: In the winter, you may need to provide supplemental heat to keep your chickens warm. A heat lamp or heated waterer can help prevent freezing. In the summer, provide shade and plenty of fresh water to keep them cool. Consider a suitable brooder area for chicks.
- Bedding: The right bedding can help insulate the coop and absorb moisture. I like to use straw or wood shavings. Avoid using cedar shavings, as they can be harmful to chickens.
By paying attention to housing and equipment, you can create a comfortable and safe environment for your meat chickens. This will help them grow quickly and stay healthy, which means more delicious meat for you!
Feeding and Nutrition Strategies
Raising meat chickens successfully hinges on providing them with the right nutrition at each stage of their development. It’s not just about throwing some feed out there; it’s about understanding what they need and when they need it. Let’s get into the specifics.
Selecting the Right Feed
Choosing the correct feed is the first step. Different stages of growth require different nutrient levels. You’ll typically start with a starter feed, move to a grower feed, and then a finisher feed. Starter feed is high in protein to support rapid growth in chicks. Grower feed is a bit less intense, and finisher feed helps them put on weight before processing. I usually go with a 28% protein game bird crumble for the first few weeks, especially if I’ve opted for chicks inoculated against coccidiosis. Then, I transition to a 22% broiler crumble.
Establishing a Feeding Schedule
Consistency is key. Chickens thrive on routine, and a regular feeding schedule helps them feel secure and prevents overeating or underfeeding.
Here’s a basic schedule I follow:
- Chicks (0-4 weeks): Free-feed starter crumble. Make sure the feeders are accessible and clean.
- Growers (4-8 weeks): Transition to grower pellets, still free-feeding.
- Finishers (8 weeks to processing): Switch to finisher pellets, monitoring their weight gain closely.
Establishing a feeding schedule right away promotes healthy eating habits and ensures the birds are receiving enough food.
Supplementing with Vitamins and Minerals
Sometimes, feed alone isn’t enough. Supplementing with vitamins and minerals can help ensure your chickens are getting a balanced diet. I like to use electrolytes and probiotics, especially during the first week, to support their digestive systems. These are easily added to their water. Also, don’t forget about grit! Grit helps chickens digest their food properly, since they don’t have teeth. It’s especially important if they aren’t foraging for insects and small stones on their own.
Here’s a quick rundown of supplements I use:
- Electrolytes: For the first week, added to water.
- Probiotics: For the first week, also added to water.
- Grit: Offered free-choice, especially for chickens not foraging.
Health and Disease Prevention Techniques
Raising meat chickens isn’t just about feed and housing; keeping them healthy is super important. A sick flock means lost time and money, so let’s talk about how to keep your birds in top shape.
Common Health Issues in Meat Chickens
Chickens, like any animal, can get sick. Knowing what to look for is half the battle. Respiratory problems are common, showing up as sneezing or bubbly eyes. Parasites, both internal and external, can also cause issues. Watch for changes in behavior, like decreased appetite or energy. Leg problems can also occur, especially in fast-growing breeds. Early detection is key, so check your birds regularly. If you notice something off, don’t wait – get advice from a vet or experienced farmer.
Preventative Care Practices
Prevention is way easier than treating a sick flock. Here are some things I do:
- Keep the coop clean. I’m talking regular cleaning and fresh bedding. This cuts down on bacteria and parasites.
- Make sure they have clean water. Dirty water spreads disease fast.
- Give them enough space. Overcrowding stresses birds and makes them more likely to get sick.
- Good ventilation is a must. Stale air breeds problems.
- Quarantining new birds is also a good idea. Keep them separate for a couple of weeks to make sure they aren’t bringing anything nasty into your flock.
I always say, a little extra effort on the front end saves a ton of headaches later. Think of it as an investment in your flock’s future.
Vaccination and Medication Guidelines
Vaccination can protect against some common diseases. Talk to your vet about what’s recommended in your area. They can help you figure out a vaccination schedule that makes sense for your flock. As for medications, only use them when necessary and always follow the instructions carefully. Overusing antibiotics can lead to resistance, which is bad news for everyone. If you’re not sure, ask a professional. It’s better to be safe than sorry when it comes to your birds’ health.
Growth and Development Monitoring
It’s super important to keep a close eye on how your meat chickens are growing. This isn’t just about seeing them get bigger; it’s about making sure they’re healthy and developing properly. Consistent monitoring helps you catch any potential problems early on, allowing you to adjust their feed, environment, or care as needed.
Understanding Growth Stages
Meat chickens, especially breeds like Cornish crosses, grow incredibly fast. Understanding their growth stages helps you anticipate their needs and adjust your management practices accordingly. Here’s a general idea of what to expect:
- Weeks 0-3: Rapid growth phase. Chicks need high-protein starter feed and constant access to food and water. You’ll see them almost double in size each week.
- Weeks 4-6: Continued rapid growth. Transition to a grower feed with slightly less protein. Monitor for leg problems due to their increasing weight.
- Weeks 7-9: Finishing phase. Switch to a finisher feed to optimize meat production. Prepare for processing.
Tracking Weight Gain
Regularly weighing your chickens is a great way to track their progress and identify any issues. You don’t need to weigh every single bird every day, but taking a sample of weights each week can give you a good overview of the flock’s health. Broiler body weight monitoring is key.
Here’s a simple table to illustrate ideal weight gain (these are approximate and can vary by breed):
| Week | Average Weight (lbs) |
|---|---|
| 1 | 0.5 |
| 3 | 2.0 |
| 6 | 5.0 |
| 8 | 8.0+ |
If your chickens are consistently below these weights, it could indicate a problem with their feed, health, or environment. If they are consistently gaining too much weight, you may need to consider feed restriction to avoid health problems.
Signs of Healthy Development
Besides weight, there are other signs to look for to ensure your chickens are developing well:
- Feather Development: Feathers should be growing in smoothly and evenly. Patchy or slow feather growth can indicate nutritional deficiencies or stress.
- Leg Strength: Chickens should be able to walk and stand without difficulty. Leg problems are common in fast-growing breeds, so monitor them closely.
- Appetite and Water Intake: Healthy chickens have a good appetite and drink plenty of water. A sudden decrease in either can be a sign of illness.
- Behavior: Observe their behavior. Are they active and alert? Or are they lethargic and withdrawn? Healthy chickens are generally active and curious.
Monitoring your chickens’ growth and development is an ongoing process. By paying close attention to their weight, physical appearance, and behavior, you can ensure they are healthy and thriving, leading to a successful meat production.
Processing and Butchering Methods
Okay, so you’ve raised your chickens, and they’re ready. Now comes the, uh, less fun part. Processing and butchering is how you turn those birds into food. It’s the last step before they hit your dinner table, so you want to do it right. It takes some planning, but it doesn’t have to be super stressful.
Preparing for Processing Day
First, figure out when your chickens are ready. Usually, it’s around 10-12 weeks, when they’re about 6-7 pounds. Some signs are weight gain and their combs getting redder. I like to do processing in batches because they don’t all grow at the same rate.
Now, get everything ready. You’ll need a few things:
- A sharp knife or poultry processing tool is a must. You want it to be quick and clean.
- A kill cone helps restrain the bird. It makes things easier and safer.
- A big pot for scalding. Get the water to about 140-150°F (60-66°C).
- A plucker (if you have one). If not, you’ll be plucking by hand.
- Containers for the innards and feathers. A garbage can works fine.
- A chilling station. A cooler full of ice water is perfect.
- Packaging materials. Bags, shrink wrap, or butcher paper—whatever you prefer.
- Freezer space. Clear it out beforehand!
Make sure to remove feed from your chickens at least 4 hours before processing. This helps empty their intestines and reduces the risk of, well, making a mess. Keep water available until about an hour before. The only exception is if it’s super hot; then, keep cool water available.
Butchering Techniques
The goal is to process the chickens humanely and efficiently. Here’s a basic rundown:
- Bleeding: Use a sharp knife to cut the jugular veins. A kill cone helps keep the bird still.
- Scalding: Dip the chicken in hot water for about 30-60 seconds. This loosens the feathers.
- Plucking: Remove the feathers. A plucker makes this way faster, but you can do it by hand.
- Eviscerating: Remove the internal organs. Be careful not to puncture anything.
- Chilling: Put the carcass in ice water to cool it down quickly.
Post-Processing Care
After processing, it’s important to handle the meat properly. Here are some tips:
- Wash the bird thoroughly, inside and out.
- Chill the chickens in large containers in the refrigerator for 2-4 days to age the meat, which tenderizes it.
- Use clean tools and surfaces when butchering to avoid contamination.
- You can freeze whole chickens or cut them into legs, quarters, wings, chicken back, and breast meat.
- Package the meat properly to prevent freezer burn. Make sure to label and date everything.
Here’s a simple table for storing chicken:
| Cut | Storage Time (Freezer) |
|---|---|
| Whole Chicken | 12 Months |
| Chicken Pieces | 9 Months |
Don’t forget to clean up your processing area thoroughly. This helps prevent the spread of bacteria and keeps things sanitary. Processing your own chickens can be a lot of work, but it’s rewarding to know exactly where your food comes from.
Potential Obstacles in Raising Meat Chickens
Okay, so raising meat chickens isn’t always sunshine and rainbows. You’re gonna run into some snags. It’s just part of the deal. But don’t let that scare you off! Knowing what could go wrong is half the battle. Then you can plan for it, and be ready.
Dealing with Predators
Predators are a HUGE concern. We’re talking foxes, coyotes, hawks, even the neighbor’s dog if it’s got a taste for chicken. Good fencing is your first line of defense. Make sure it’s buried a bit, because foxes will dig. And cover the top, because hawks will swoop. A secure coop is also a must, especially at night. Motion-activated lights can help scare off nighttime visitors. And if you live in an area with a lot of predators, consider getting a livestock guardian dog or some geese; they’re surprisingly good at sounding the alarm.
Managing Disease Outbreaks
Disease can wipe out your whole flock fast. It’s awful. Prevention is key. Keep the coop clean, provide fresh water daily, and make sure your chicks come from a reputable source. Watch your birds closely for any signs of illness – lethargy, ruffled feathers, weird poop, anything out of the ordinary. If you see something, isolate the sick bird immediately. Knowing common health issues is important. Have a vet you can call if things get bad. And be prepared to cull birds if necessary to stop the spread of disease. It’s tough, but sometimes it’s the only way.
Weather-Related Challenges
Weather can be a real pain. Extreme heat, extreme cold, heavy rain – all can stress your birds and make them sick. In the summer, make sure they have plenty of shade and fresh, cool water. A fan can help too. In the winter, a well-insulated coop is essential. You might need a heat lamp, but be careful with those – they can be a fire hazard. And make sure the coop is well-ventilated to prevent moisture buildup, which can lead to frostbite. Rain can create muddy conditions, which are breeding grounds for bacteria. Good drainage is important. And if you get a lot of snow, make sure the coop roof can handle the weight.
Raising chickens is a learning experience. You’re going to make mistakes. Don’t beat yourself up about it. Just learn from them and keep going. Every season is different, and every flock is different. There’s always something new to learn. The important thing is to be observant, be prepared, and be persistent.
Encouragement for New Chicken Farmers
So, you’re thinking about raising meat chickens? That’s awesome! It can seem like a lot at first, but trust me, it’s totally doable. There will be ups and downs, but the reward of knowing exactly where your food comes from is worth it. Don’t get discouraged by initial setbacks. Every experienced farmer started somewhere, and every mistake is a lesson learned. Let’s dive into how to make this journey a bit smoother.
Building a Support Network
One of the best things you can do is connect with other chicken farmers. Seriously, it makes a huge difference. Find people who are already doing it, whether it’s through local clubs or online forums. Ask questions, share your experiences, and don’t be afraid to admit when you’re struggling. You can find local groups to discuss sustainable chicken farming and share tips.
- Local Poultry Clubs: These are goldmines of information. You’ll meet people who know the ins and outs of raising chickens in your specific area.
- Online Forums: Perfect for getting advice any time of day or night. Plus, you can connect with people from all over the world.
- Social Media Groups: Many chicken farmers have groups on Facebook or other platforms. It’s a great way to see what others are doing and get quick answers to your questions.
Learning from Experience
The best lessons often come from your own experiences, both good and bad. Don’t be afraid to experiment and try new things. Keep a journal to track what works and what doesn’t. Over time, you’ll develop your own unique approach to raising chickens that suits your specific needs and circumstances.
Remember that every farm is different. What works for one person might not work for you. The key is to be observant, adaptable, and willing to learn as you go.
Staying Informed on Best Practices
Things are always changing in the world of chicken farming. New research comes out, new products become available, and new challenges arise. It’s important to stay up-to-date on the latest best practices. Here are a few ways to do that:
- Read books and articles: There are tons of resources out there, both online and in print. Look for reputable sources that offer evidence-based advice.
- Attend workshops and conferences: These are great opportunities to learn from experts and network with other farmers.
- Follow industry blogs and websites: Stay informed about new developments and trends in the chicken farming world.
Wrapping It Up
So, there you have it! Raising meat chickens can be a fun and satisfying adventure. You get to know exactly where your food comes from, and it can save you some cash too. We’ve talked about everything from picking the right breed to setting up a cozy coop and keeping your birds healthy. Remember, it’s all about trial and error. Don’t be afraid to experiment and learn from your mistakes. Join local groups or online forums to share tips and tricks with fellow chicken enthusiasts. With a bit of patience and care, you’ll be well on your way to enjoying fresh, home-raised chicken. Happy farming!
Frequently Asked Questions
What is the best breed of chicken for meat?
The best breeds for meat are Cornish Cross and Red Ranger. They grow quickly and are great for meat production.
How do I set up a brooder for my chicks?
A brooder should be warm, safe, and spacious. Use a heat lamp to keep them warm and provide bedding like straw or wood shavings.
What should I feed my meat chickens?
Feed them a balanced diet with high protein. You can buy special chicken feed that’s designed for meat birds.
How can I tell if my chickens are healthy?
Healthy chickens are active, eat well, and have bright eyes. Look for signs like good feather condition and normal droppings.
What should I do if my chickens get sick?
If your chickens show signs of illness, separate them from the others and consult a vet for advice on treatment.
When is the right time to butcher my chickens?
You can butcher your chickens when they reach about 8 to 12 weeks old, depending on the breed and their weight.