“This post contains affiliate links. As an Amazon Associate, I earn from qualifying purchases”
Thinking about raising chickens? You’re not alone! Many people are jumping into the world of backyard poultry, and it can be a rewarding experience. Whether you want fresh eggs or just a few feathered friends, this guide will walk you through how to raise chickens step by step. From setting up your space to collecting those delicious eggs, we’ve got you covered.
Key Takeaways
- Choose a suitable location and understand local laws before setting up your chicken coop.
- Gather essential supplies like feed, water containers, and a cozy brooder for your chicks.
- Select chicken breeds that fit your needs, focusing on egg production and temperament.
- Keep your coop clean and monitor your chickens’ health regularly to prevent issues.
- Learn the best practices for egg collection and storage to ensure freshness.
Preparing Your Space For Chickens
Before you even think about bringing those fluffy little chicks home, you’ve got to get your space ready. It’s more than just having a backyard; it’s about creating a safe and suitable environment for your new feathered friends. Trust me, a little preparation goes a long way in preventing headaches down the road. Let’s get into it.
Choosing The Right Location
Location, location, location! It’s not just for real estate; it’s crucial for chickens too. You want a spot that’s relatively flat, well-drained, and offers some protection from the elements. Think about sunlight exposure, wind direction, and proximity to potential predators. Chickens need sunlight, but too much direct sun in the summer can be a problem. Also, consider how far the coop will be from your house – you’ll be making trips out there every day, so you don’t want it to be a trek. A good location will also make coop cleaning easier.
Understanding Local Regulations
Before you start building that dream coop, take a moment to check your local ordinances. Many cities and towns have rules about keeping chickens, including restrictions on the number of birds, coop size, and setbacks from property lines. Ignoring these regulations can lead to fines or even having to get rid of your chickens, which would be heartbreaking. It’s always better to be safe than sorry. A quick call to your local zoning office can save you a lot of trouble. Make sure you understand the local regulations before you start.
Designing A Safe Coop
The coop is your chickens’ home, so it needs to be safe, secure, and comfortable. Here are some things to consider:
- Size: Each chicken needs at least 4 square feet of coop space and 8-10 square feet of run space. Don’t overcrowd them!
- Ventilation: Good airflow is essential to prevent moisture buildup and respiratory problems. Make sure there are vents near the roof.
- Predator Protection: This is huge. Use strong wire mesh (like hardware cloth) for the run and bury it a foot deep to prevent digging predators. Secure the coop door with a strong latch.
- Roosting Bars: Chickens like to roost off the ground at night. Provide roosting bars that are at least 2 inches wide and spaced about 12 inches apart.
- Nesting Boxes: Provide one nesting box for every 3-4 hens. Line them with straw or wood shavings to make them cozy.
A well-designed coop is an investment in your chickens’ health and happiness. Take the time to plan it out carefully, and you’ll be rewarded with healthy, productive birds.
Gathering Essential Supplies
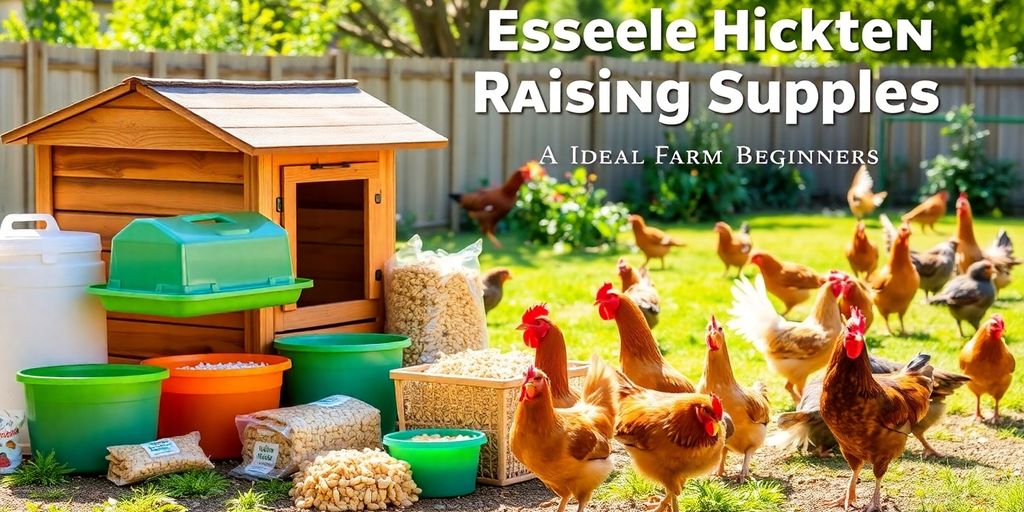
Okay, so you’re getting ready to bring your chickens home. Exciting! But before those fluffy butts arrive, you gotta make sure you have all the right stuff. It’s like prepping for a baby, but with more feathers and less sleep (maybe). Let’s run through the must-haves.
Selecting The Right Coop
Choosing a coop is a big deal. It’s their home, their safe space, and where they’ll spend a good chunk of their time. You can buy a pre-made coop, which is super convenient, or you can build your own if you’re feeling handy. I’ve done both! Pre-made ones are easier, but building your own lets you customize it to your exact needs. Make sure it’s big enough for all your chickens to comfortably roost and move around. Overcrowding leads to cranky chickens, and nobody wants that. Also, predator-proof is key. Raccoons, foxes, even neighborhood dogs can be a threat. Secure latches and sturdy wire are a must. Think Fort Knox, but for chickens.
Purchasing Feed And Watering Equipment
Chickens need to eat and drink, obviously. But not just any old bowl will do. You need feeders and waterers that are designed to keep the food and water clean and prevent spillage. I’ve tried a bunch of different types, and I’ve found that the ones that hang are the best. They keep the food and water off the ground, which means less mess and fewer chances for bacteria to grow. You’ll also need to figure out what kind of feed you’re going to use. Starter feed for chicks, grower feed for pullets, and layer feed for laying hens. And don’t forget the grit! Chickens need grit to help them digest their food properly.
Setting Up Nesting Boxes
Nesting boxes are where your hens will lay their eggs. You’ll want one nesting box for every four to five hens. They don’t all need their own private space, they’re happy to share. Line the boxes with soft bedding, like straw or wood shavings, to make them comfy and inviting. Place the nesting boxes in a quiet, dark corner of the coop. Chickens like privacy when they’re laying. And speaking of eggs, you’ll also want to have a plan for storing them. A simple egg carton will do, but you can also get fancy egg baskets or even egg skelters (those spiral things that let you use the oldest eggs first).
Getting all your supplies sorted out before your chickens arrive will make the whole process so much smoother. Trust me, you don’t want to be running around trying to find a waterer when you have a bunch of peeping chicks waiting for you. A little preparation goes a long way!
Choosing The Right Chicken Breeds
Okay, so you’re getting chickens! That’s awesome. But before you rush out and grab the first fluffy chick you see, let’s talk about breeds. It’s not just about looks; different breeds have different personalities, egg-laying abilities, and tolerance for weather. Choosing the right breed can make a huge difference in your chicken-raising experience. I know someone who didn’t do their research and ended up with a bunch of super loud chickens that barely laid any eggs. Not ideal!
Popular Backyard Breeds
There are tons of chicken breeds out there, but some are definitely more popular for backyard flocks than others. Here are a few favorites:
- Orpingtons: These are big, fluffy, and friendly. They’re also pretty good layers and do well in cold weather. I’ve got a Buff Orpington named Oprah, and she’s the sweetest chicken ever.
- Plymouth Rocks: Another classic breed, Plymouth Rocks are known for their hardiness and good egg production. They come in different colors, but the Barred Rock is probably the most recognizable.
- Rhode Island Reds: If you want eggs, these are your girls. Rhode Island Reds are prolific layers and are pretty low-maintenance. They can be a little bossy, though.
- Wyandottes: These are beautiful birds with laced feathers. They’re cold-hardy and lay a decent amount of eggs. They’re also known for being pretty calm and docile.
- Leghorns: These are egg-laying machines! Leghorns are smaller birds that don’t eat as much, but they lay a ton of white eggs. They can be a bit flighty, though.
Understanding Breed Characteristics
It’s important to understand what you’re looking for in a chicken before you choose a breed. Here are some things to consider:
- Egg Production: How many eggs do you want per week? Some breeds lay five or more eggs per week, while others lay much less. Also, egg production slows down in the winter and as the chickens get older. If you want to maximize egg production, choose a breed known for laying lots of eggs.
- Climate: Do you live in a hot or cold climate? Some breeds are more cold-hardy than others. If you live in a cold area, choose a breed that can handle the winter. If you live in a hot area, choose a breed that can tolerate the heat.
- Temperament: Do you want friendly chickens that you can handle? Some breeds are more docile than others. If you have kids, you’ll probably want to choose a breed that’s known for being friendly.
- Size: Do you want big chickens or small chickens? Big chickens eat more, but they also lay bigger eggs. Small chickens don’t eat as much, but they lay smaller eggs.
- Broodiness: Do you want chickens that will hatch their own eggs? Some breeds are more broody than others. If you want to hatch your own chicks, choose a broody breed. Hybrid breeds may have had their broodiness bred out of them.
Where To Buy Chickens
Okay, so you’ve decided on a breed. Now, where do you get them? You have a few options:
- Hatcheries: Hatcheries are a great place to buy chicks, especially if you want a specific breed. You can order chicks online and have them shipped to you. Just make sure you order enough chicks to keep them warm during shipping. I’ve heard of hatcheries running out of chicks, so plan ahead.
- Local Breeders: Buying from a local breeder is a great way to support your community and get chickens that are already acclimated to your climate. You can find local breeders online or by asking around at your local feed store.
- Feed Stores: Some feed stores sell chicks in the spring. This is a convenient option if you need to pick up feed and supplies anyway. However, the selection may be limited.
Choosing the right chicken breed is a big decision, but it doesn’t have to be stressful. Do your research, consider your needs, and have fun with it! Remember, each breed has its own unique charm and quirks. And hey, if you mess up, you can always get more chickens later! Just make sure you know the best chicken breed for you. I’ve made mistakes, and it’s all part of the learning process. Happy chickening!
Setting Up The Brooder
Okay, so you’ve got your chicks on the way! Exciting, right? Now, let’s talk about setting up their temporary home – the brooder. Think of it as their nursery for the first few weeks. It needs to be safe, warm, and have everything they need to thrive.
Creating A Comfortable Environment
First things first, you need a container. A big cardboard box works great, or even a plastic tub. You can also section off a part of your garage or shed. The size depends on how many chicks you have. Make sure there’s enough room for them to move around freely, but not so much space that they get lost or can’t find the heat source.
Here’s what you’ll need to consider:
- Bedding: Pine shavings are a good choice. Avoid cedar shavings, as they can be harmful to chicks. Spread a thick layer on the bottom of the brooder.
- Cleanliness: Change the bedding regularly – daily if needed – to keep things clean and dry. Damp bedding can lead to health problems.
- Space: As they grow, you might need to upgrade to a bigger brooder or give them more space.
Maintaining Proper Temperature
Temperature is super important for baby chicks. They can’t regulate their own body temperature at first, so they rely on you to keep them warm enough. A heat lamp is the most common way to do this.
Here’s a quick guide:
| Age (Weeks) | Temperature (°F) | Temperature (°C) |
|---|---|---|
| 0-1 | 95 | 35 |
| 1-2 | 90 | 32 |
| 2-3 | 85 | 29 |
| 3-4 | 80 | 27 |
| 4-5 | 75 | 24 |
| 5-6 | 70 | 21 |
Make sure to monitor the chicks’ behavior. If they’re all huddled together under the lamp, they’re too cold. If they’re spread out and panting, they’re too hot. Adjust the height of the lamp accordingly. You can also use a thermometer to check the temperature at chick level. If you start to find your DIY project getting too overwhelming, try getting in touch with a local expert or fellow chicken enthusiast for help. There are many groups on Facebook and similar platforms dedicated to raising backyard chickens.
It’s better to err on the side of being slightly too warm than too cold. Chilling can be deadly for baby chicks. Keep a close eye on them, especially during the first few days.
Introducing Chicks To The Brooder
Once the brooder is all set up and the temperature is right, it’s time to introduce your chicks! Gently place them in the brooder. Show them where the food and water are. Dip their beaks in the water to make sure they know where to find it.
Here are a few things to keep in mind:
- Observe them closely: Watch for any signs of illness or distress.
- Provide fresh food and water: Make sure they always have access to clean food and water.
- Handle them gently: Chicks are delicate, so handle them with care. Teach family members, including children, how to appropriately handle chicks.
Feeding And Caring For Your Chickens
Understanding Chicken Nutrition
Okay, so you’ve got chickens. Now what do you feed them? It’s not just about tossing them any old scraps. Chickens need a balanced diet to stay healthy and lay those delicious eggs. Think of it like this: you wouldn’t eat pizza for every meal, right? Same goes for your feathered friends. They need a mix of protein, carbs, vitamins, and minerals.
- Commercial feed is a great starting point. Look for layer feed if you want eggs. Starter feed is for chicks, and grower feed is for pullets (teenage chickens).
- Don’t be afraid to supplement with treats! Chickens love fruits, veggies, and even bugs. Just don’t overdo it on the treats, or they might get picky and ignore their regular feed.
- Calcium is super important for eggshell formation. Make sure your chickens have access to oyster shells or a calcium supplement, especially if they’re laying regularly.
It’s important to remember that what you feed your chickens directly impacts the quality of their eggs. A well-nourished chicken will lay eggs with stronger shells and richer yolks. So, invest in good feed and provide a variety of healthy treats to keep your flock happy and productive.
Establishing A Feeding Schedule
Consistency is key when it comes to feeding your chickens. I’ve found that having a set schedule not only keeps them happy but also helps you monitor their health. If they suddenly stop eating, it’s a sign that something might be wrong. Here’s what works for me:
- Morning Feeding: I give them their main serving of layer feed in the morning. This gives them energy for the day and gets them ready to lay eggs.
- Afternoon Treat: Around mid-afternoon, I’ll give them a small treat, like some leftover salad or a handful of mealworms. They go crazy for mealworms!
- Free-Ranging Time: If the weather is nice, I let them out to free-range for a few hours. This allows them to forage for bugs and plants, which is great for their overall health. Make sure they have a safe coop to return to.
Monitoring Health And Behavior
Keeping an eye on your chickens is crucial for catching any health problems early on. Chickens are pretty good at hiding when they’re not feeling well, so you need to be observant. Here are some things I always watch out for:
- Changes in Appetite: If a chicken suddenly stops eating or drinking, it’s a red flag. It could be a sign of illness or stress.
- Droppings: Yep, you gotta look at their poop. Healthy chicken poop should be firm and brown with a white cap (that’s the urate). Runny or discolored droppings can indicate a problem.
- Behavior: Watch for changes in their behavior. Is a chicken suddenly lethargic or isolating itself from the flock? Is it laying cycles normally? These can be signs of illness or injury.
| Symptom | Possible Cause | Action |
|---|---|---|
| Loss of appetite | Illness, stress, parasites | Isolate the chicken, check for other symptoms, consult a vet if needed |
| Runny droppings | Parasites, infection, dietary changes | Monitor diet, check for other symptoms, consider a dewormer |
| Lethargy | Illness, injury, parasites | Isolate the chicken, check for injuries, consult a vet if needed |
Maintaining A Clean Coop
Establishing A Cleaning Routine
Okay, so you’ve got your chickens, they’re laying eggs, and everything seems great. But let’s talk about the less glamorous side of chicken keeping: cleaning the coop. It’s not the most fun chore, but it’s super important for your chickens’ health and happiness. Think of it like their house – you wouldn’t want to live in a dirty house, and neither do they! A consistent cleaning schedule is key to preventing disease and keeping your flock thriving.
Here’s what I try to do:
- Daily: Quick check and removal of any overly soiled bedding or droppings directly under the roost. This prevents buildup and keeps things fresher.
- Weekly: A more thorough cleaning, including removing all the bedding, scrubbing down the roosts and any surfaces that have gotten dirty. I also check for cobwebs and remove them.
- Monthly: A deep clean! This involves removing everything from the coop, scrubbing it down with a coop-safe cleaner, letting it dry completely, and then putting in fresh bedding. I also take this opportunity to inspect the coop for any damage or repairs that need to be made.
Managing Waste Effectively
Chicken poop happens. A lot of it. And it can create a real mess if you don’t manage it properly. One option is the deep litter method, where you add fresh bedding on top of the old, allowing it to compost in place. However, I prefer to remove the waste regularly. I usually compost the used bedding and droppings. It makes great fertilizer for the garden! Just make sure it’s properly composted before using it, as fresh chicken manure can be too strong for plants. You can buy wooden chicken coop to make the process easier.
Preventing Pests And Diseases
A clean coop is a happy coop, and a healthy coop. Pests and diseases thrive in dirty environments, so keeping things clean is your first line of defense. Regular cleaning helps to reduce the risk of mites, lice, and other parasites. I also like to add diatomaceous earth (DE) to the bedding. It’s a natural product that helps to control pests. Make sure to use food-grade DE, and avoid inhaling it. Also, ensure your chickens have access to a dry area for dust bathing, as this is a natural way for them to control external parasites.
Keeping your coop clean isn’t just about aesthetics; it’s about providing a healthy and safe environment for your chickens. A clean coop reduces the risk of disease, minimizes pests, and keeps your chickens happy and productive. It might seem like a lot of work, but it’s worth it in the long run.
Collecting Eggs And Managing Production
Understanding Egg Laying Cycles
Okay, so you’ve got chickens, and now you’re waiting for those golden (or brown, or blue!) eggs. Understanding the egg laying cycles is key. Most hens start laying around 6 months old, but this can vary by breed. They usually lay best in their first couple of years.
- Egg production is heavily influenced by daylight. Expect more eggs in spring and summer.
- Molting (when chickens lose and regrow feathers) can cause a temporary stop in laying.
- Older hens lay less frequently.
Best Practices For Egg Collection
Collecting eggs seems simple, but there are a few things to keep in mind to keep those eggs in tip-top shape.
- Collect eggs daily, or even twice a day, especially in hot weather, to prevent breakage and discourage broodiness (when a hen wants to sit on the eggs to hatch them).
- Use a basket or egg apron to carry eggs safely.
- Check for cracked or dirty eggs and clean them gently with a dry cloth or brush. Avoid washing them unless absolutely necessary, as it removes the protective bloom.
It’s a good idea to mark the date on your eggs with a pencil. That way, you know how old they are. I usually write the date I collected them right on the shell. It helps me keep track and use the oldest ones first.
Storing Eggs Safely
Proper storage is important to keep your eggs fresh. Here’s the lowdown:
- Store eggs in the refrigerator as soon as possible after collecting them.
- Keep them in their original carton to prevent them from absorbing odors.
- Store eggs with the pointed end down to help keep the yolk centered.
| Storage Method | Temperature | Shelf Life |
|---|---|---|
| Refrigerator | 40°F (4°C) | 3-5 weeks |
| Room Temp | N/A | Not Recommended |
Wrapping It Up
So there you have it! Raising chickens isn’t as tough as it might seem at first. Just take it step by step, and don’t rush things. Make sure you’ve got the right setup, keep everything clean, and pay attention to your birds’ needs. If you hit a snag, don’t hesitate to ask for help from fellow chicken lovers or local experts. They can be a great resource. Before you know it, you’ll have a happy flock that’s laying eggs and bringing joy to your backyard. Enjoy the journey, and happy chicken raising!
Frequently Asked Questions
How much space do chickens need?
Chickens need at least 4 square feet of space in the coop and about 10 square feet in the outdoor run.
What do chickens eat?
Chickens eat a mix of grains, vegetables, and special feed designed for them. They also enjoy treats like fruits and insects.
How often do chickens lay eggs?
Most hens lay eggs about 5-6 times a week, depending on their breed and age.
Can chickens live in cold weather?
Yes, chickens can live in cold weather, but they need a warm coop and protection from wind and moisture.
What should I do if my chicken is sick?
If a chicken looks sick, it’s best to separate it from the others and consult a vet who knows about chickens.
How do I keep my coop clean?
Regularly remove waste, replace bedding, and do a deep clean every few weeks to keep the coop clean and healthy.